How to Manage Translations #
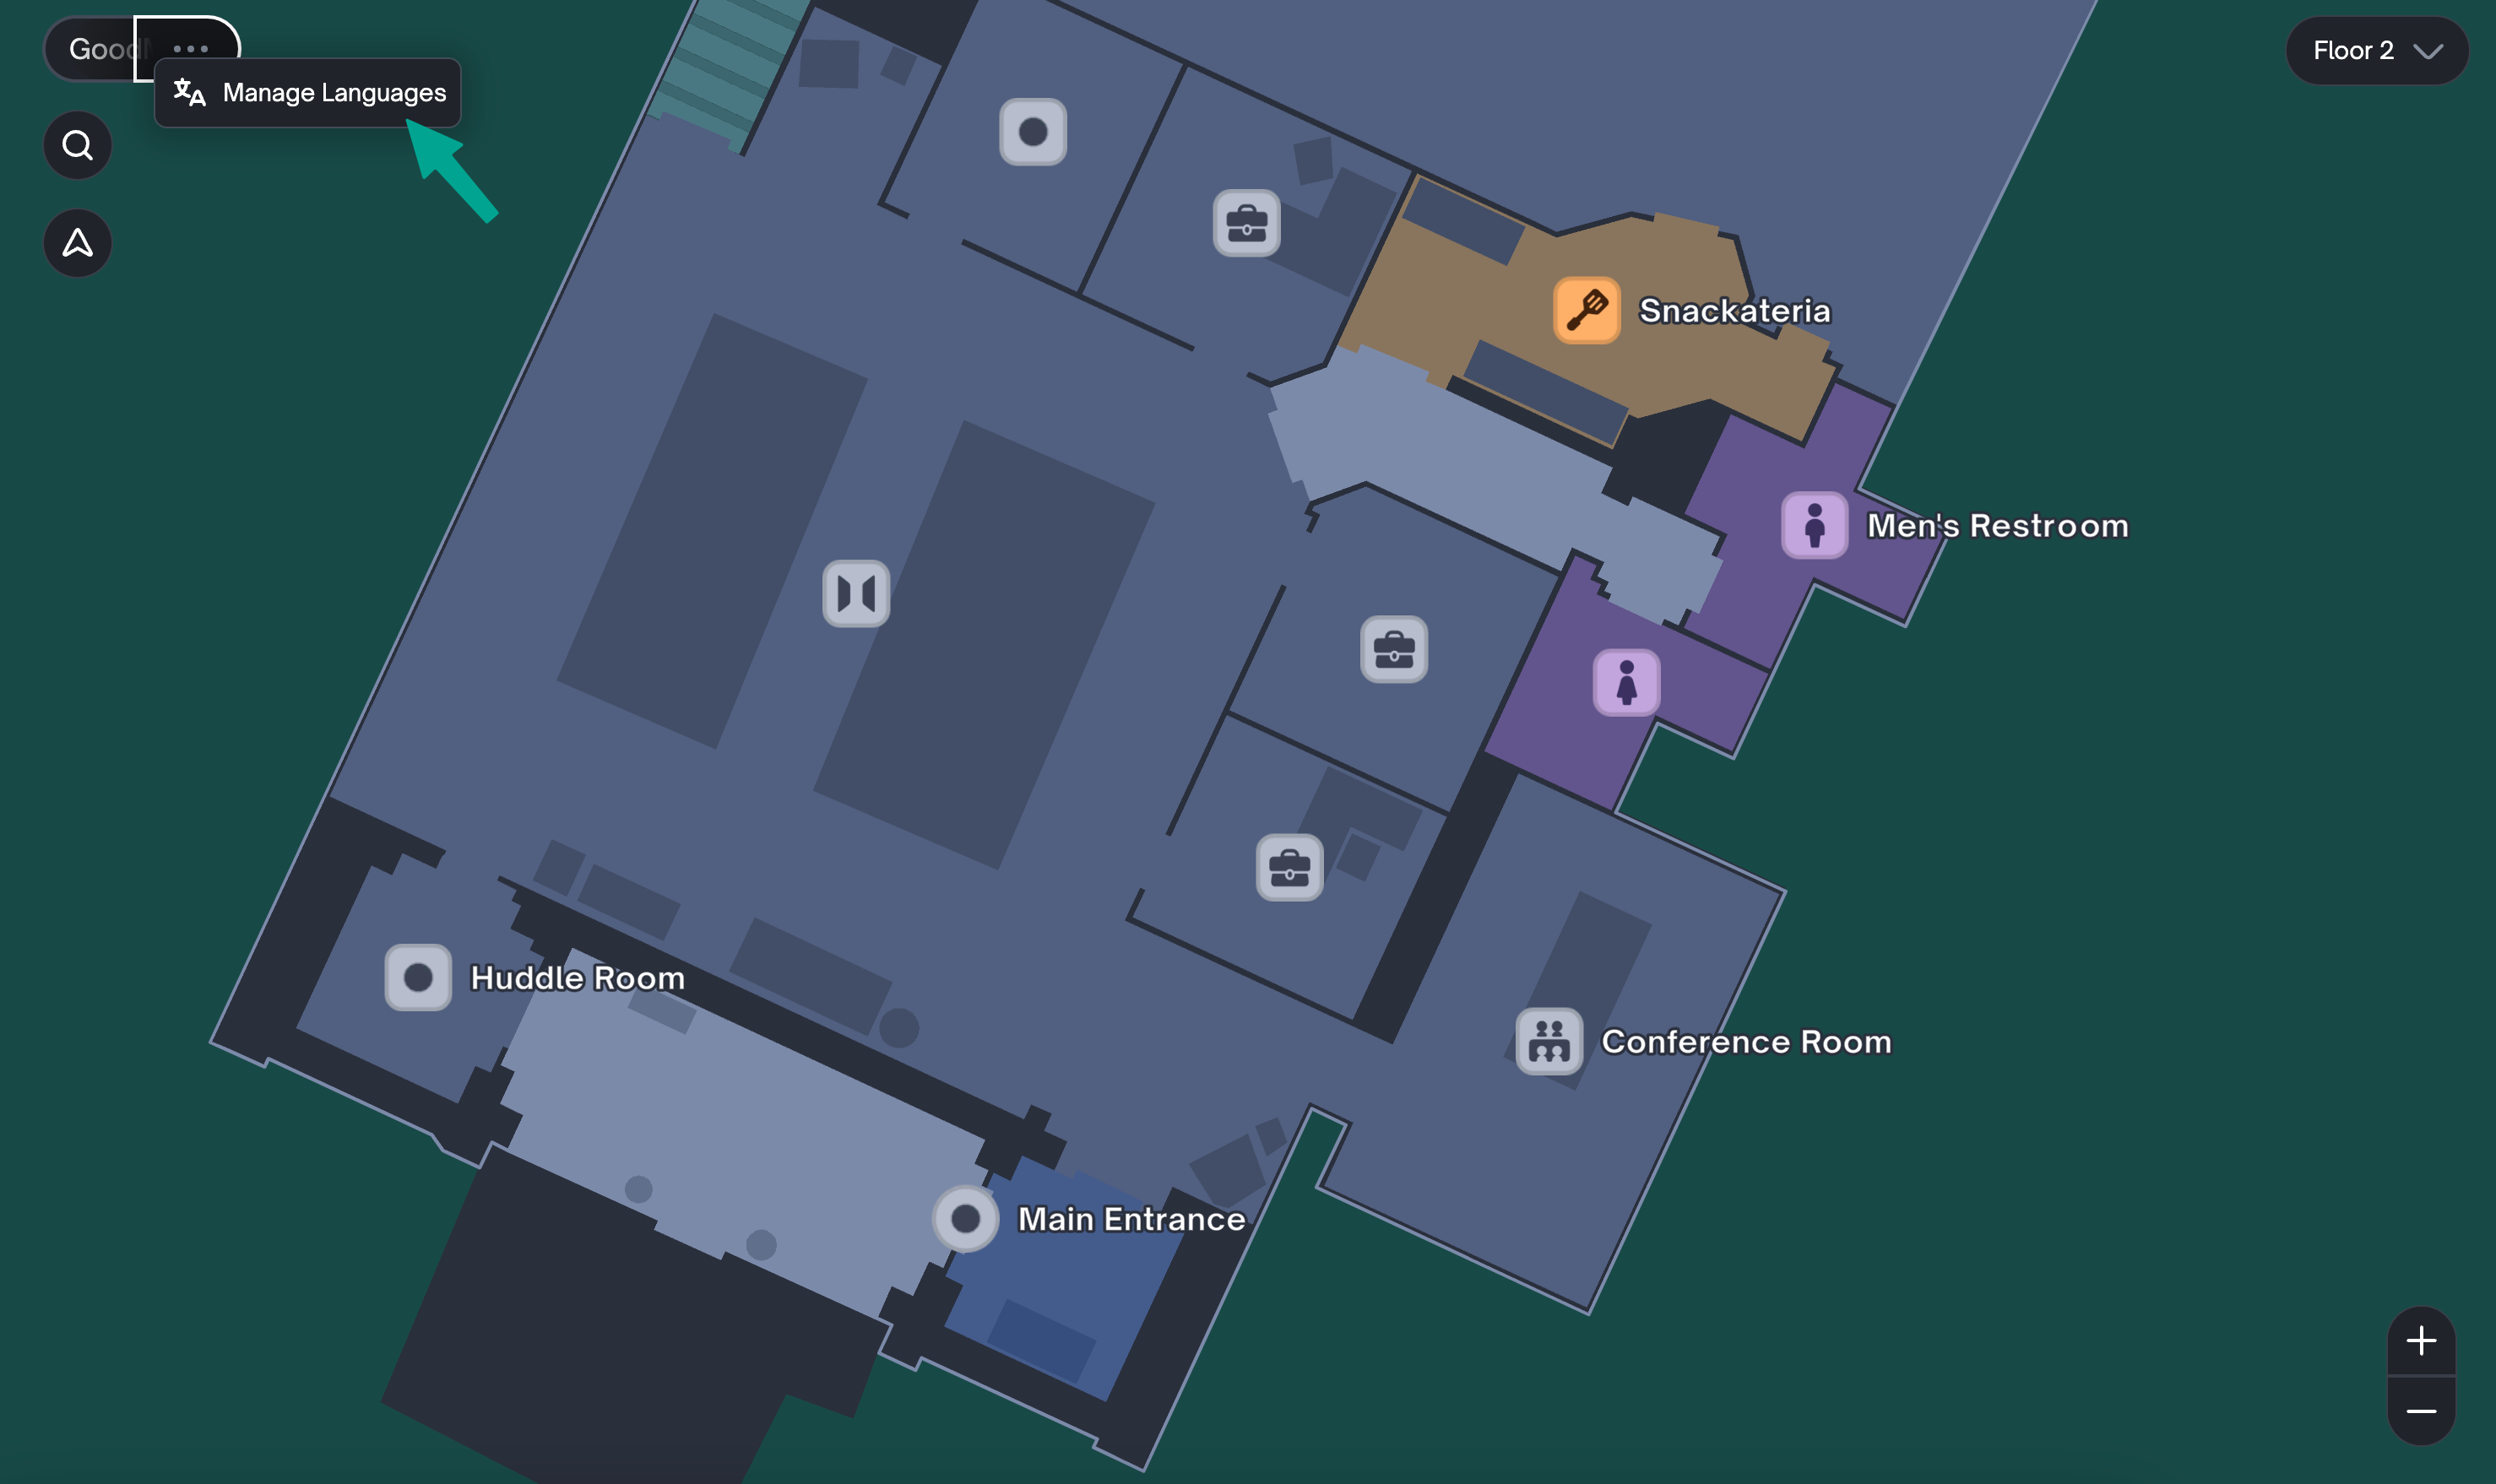
- In the top left corner where the map’s name is located, hovering over it shows 3 dots that you can click on. It will open up another pop-up labeled “Manage Languages.” Click it to open the “Language Management” menu.
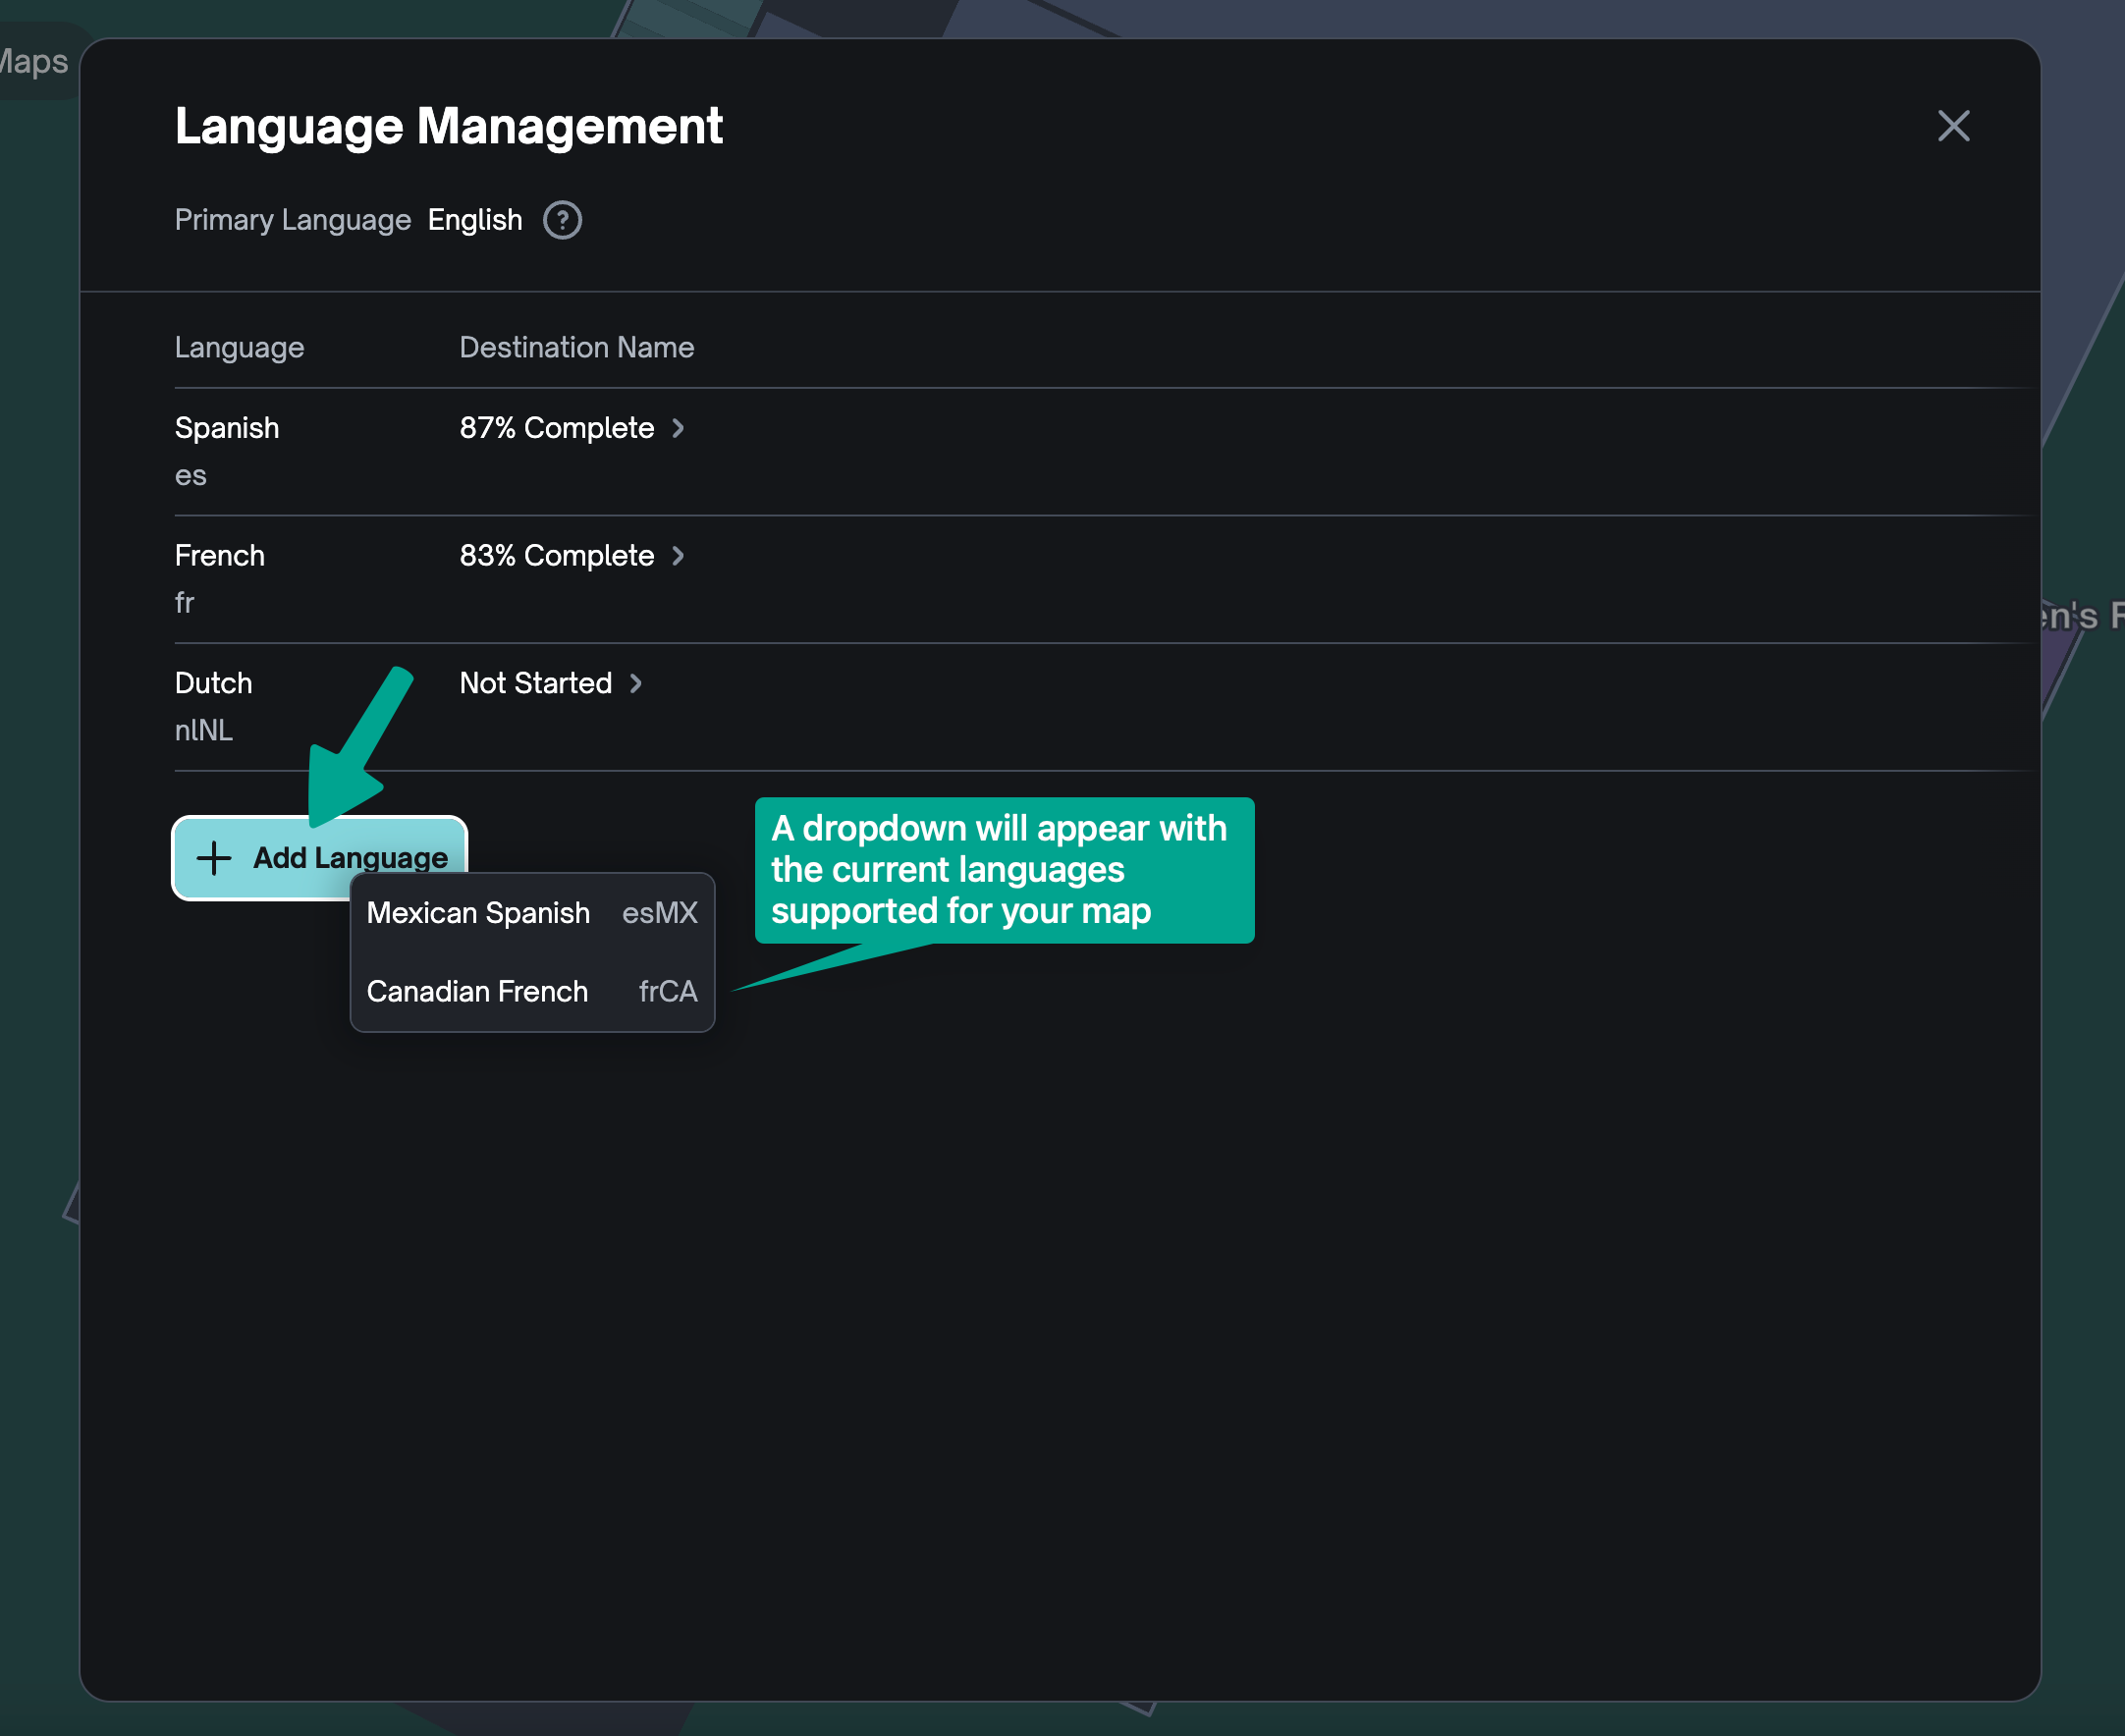
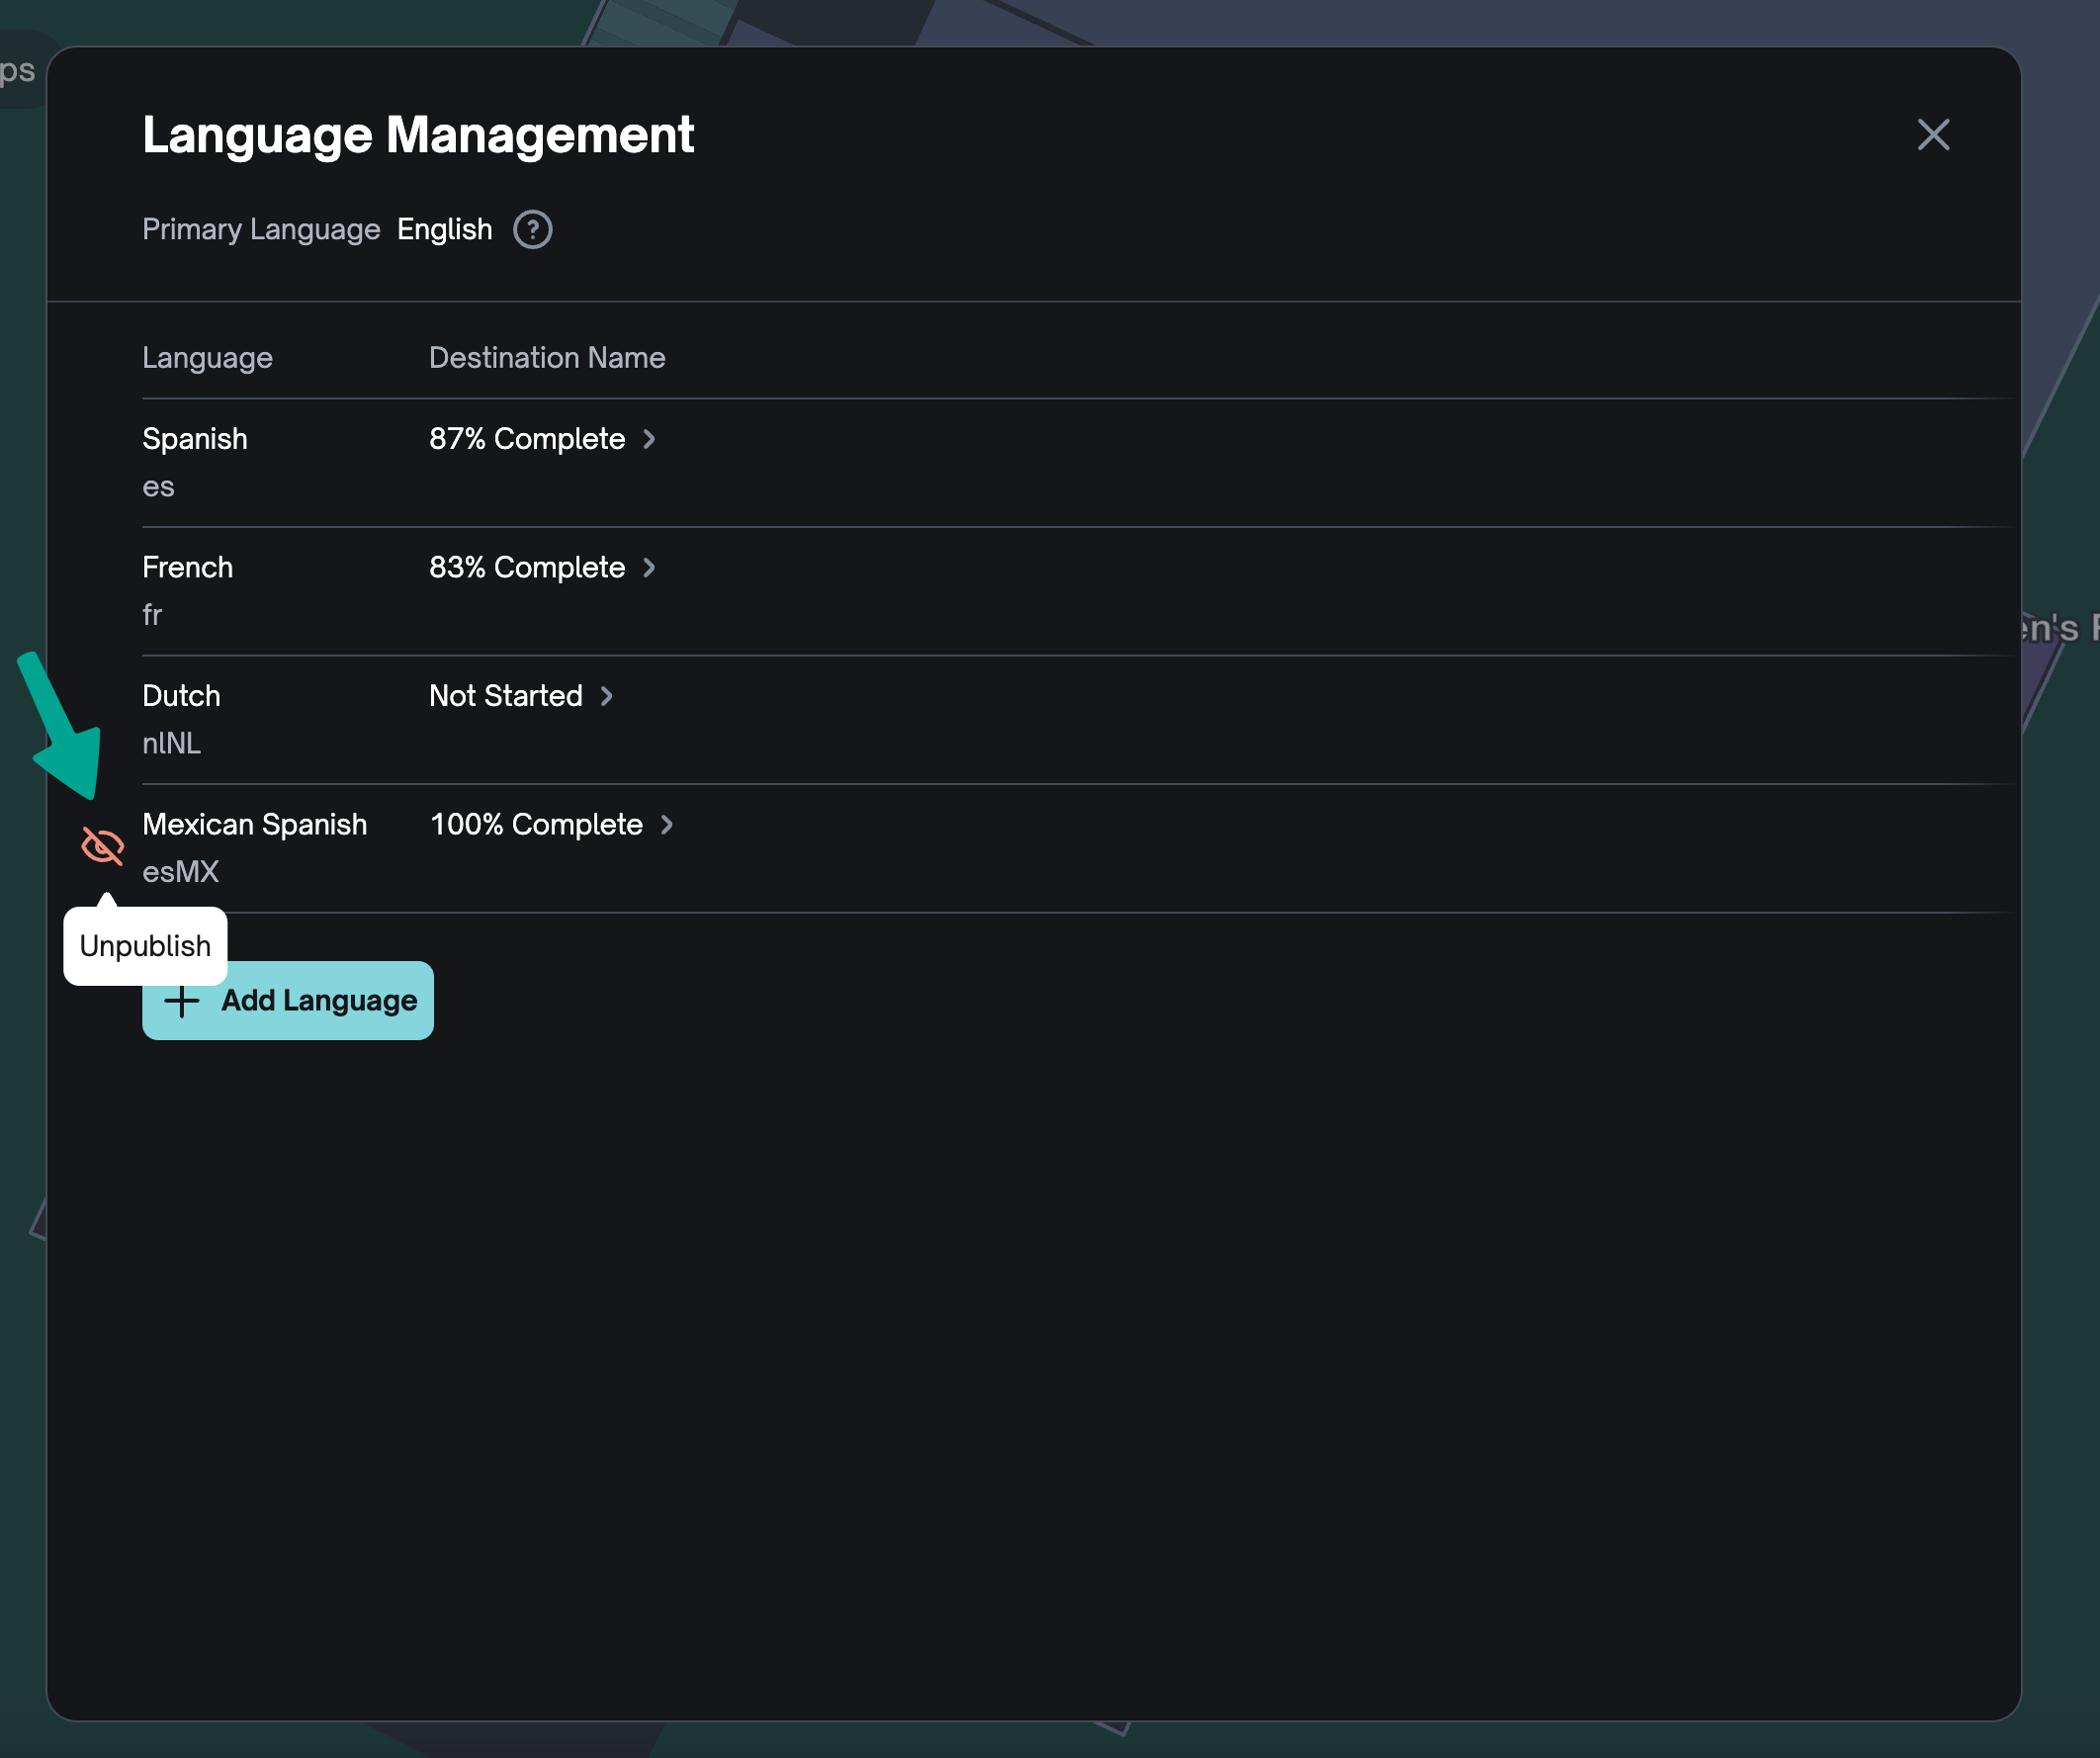
- There will be a button towards the bottom of the menu to add a new language. Hovering over it will show you all the available languages that are currently supported for your map. Select the language you would like to add and it will appear in the “Language Management” menu.
How to Edit Map Translations via the Side Sheet #
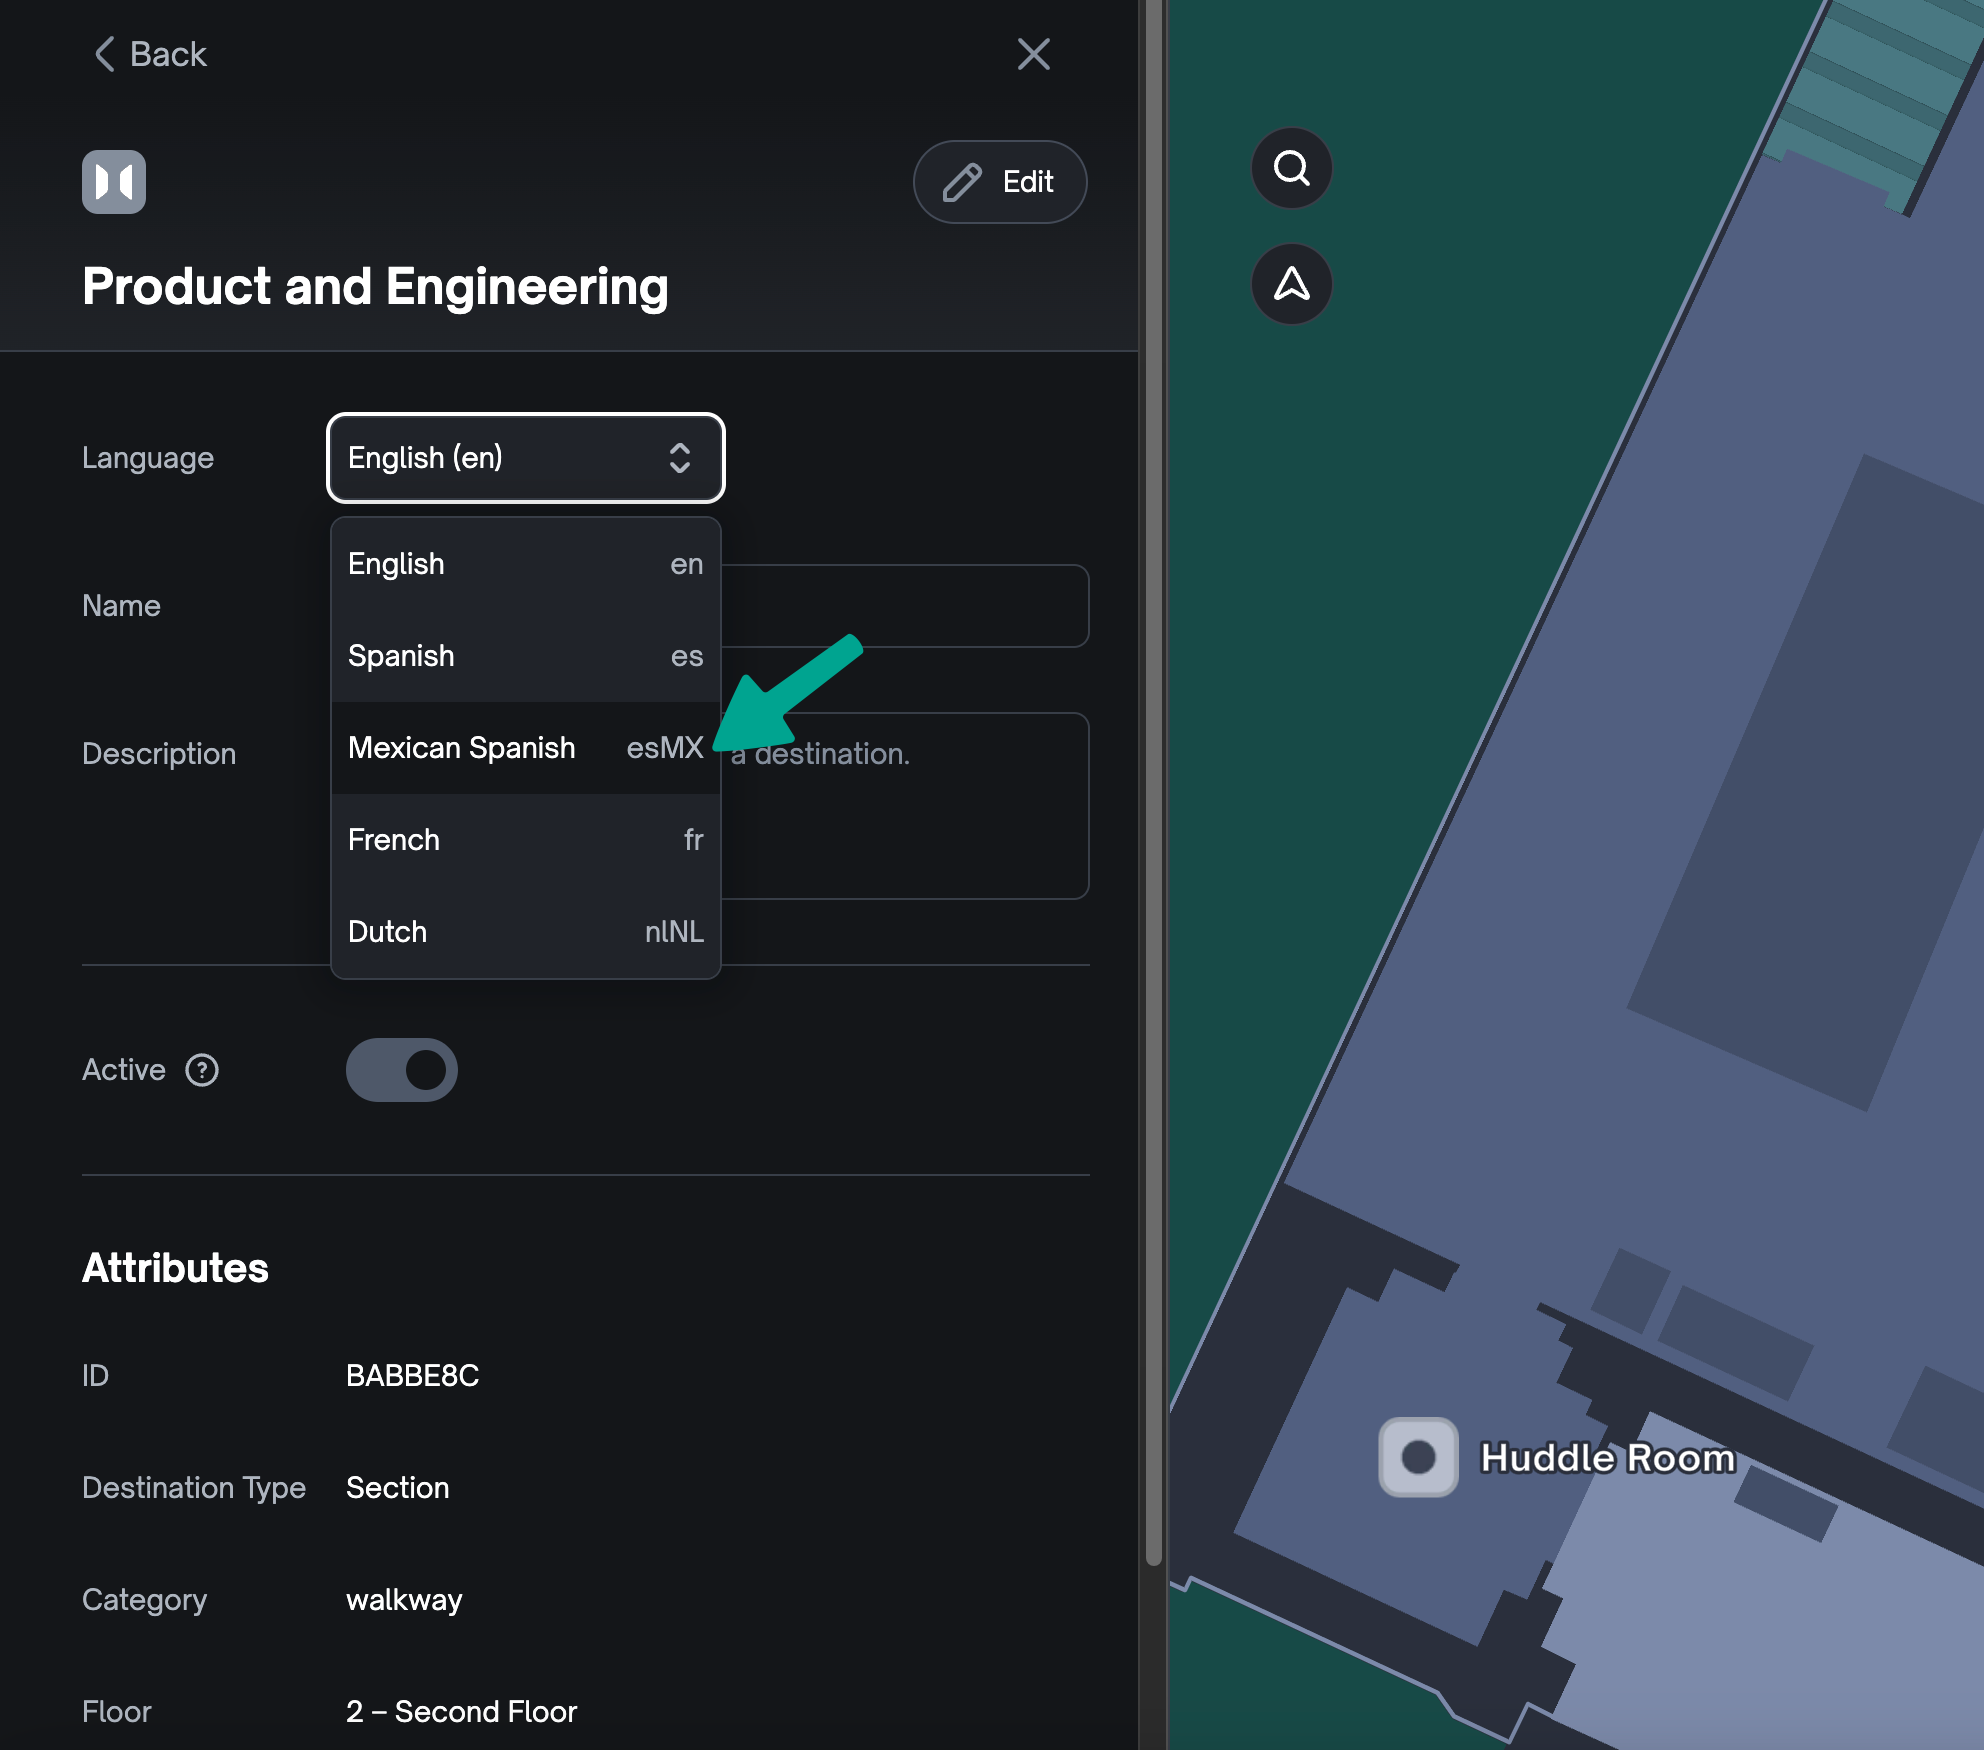
- Click on a destination within the map to open up the side sheet. You can then select a language in the first dropdown.
- Note: You can edit the destination translations of multiple languages in the side sheet by toggling the language dropdown to your desired language.
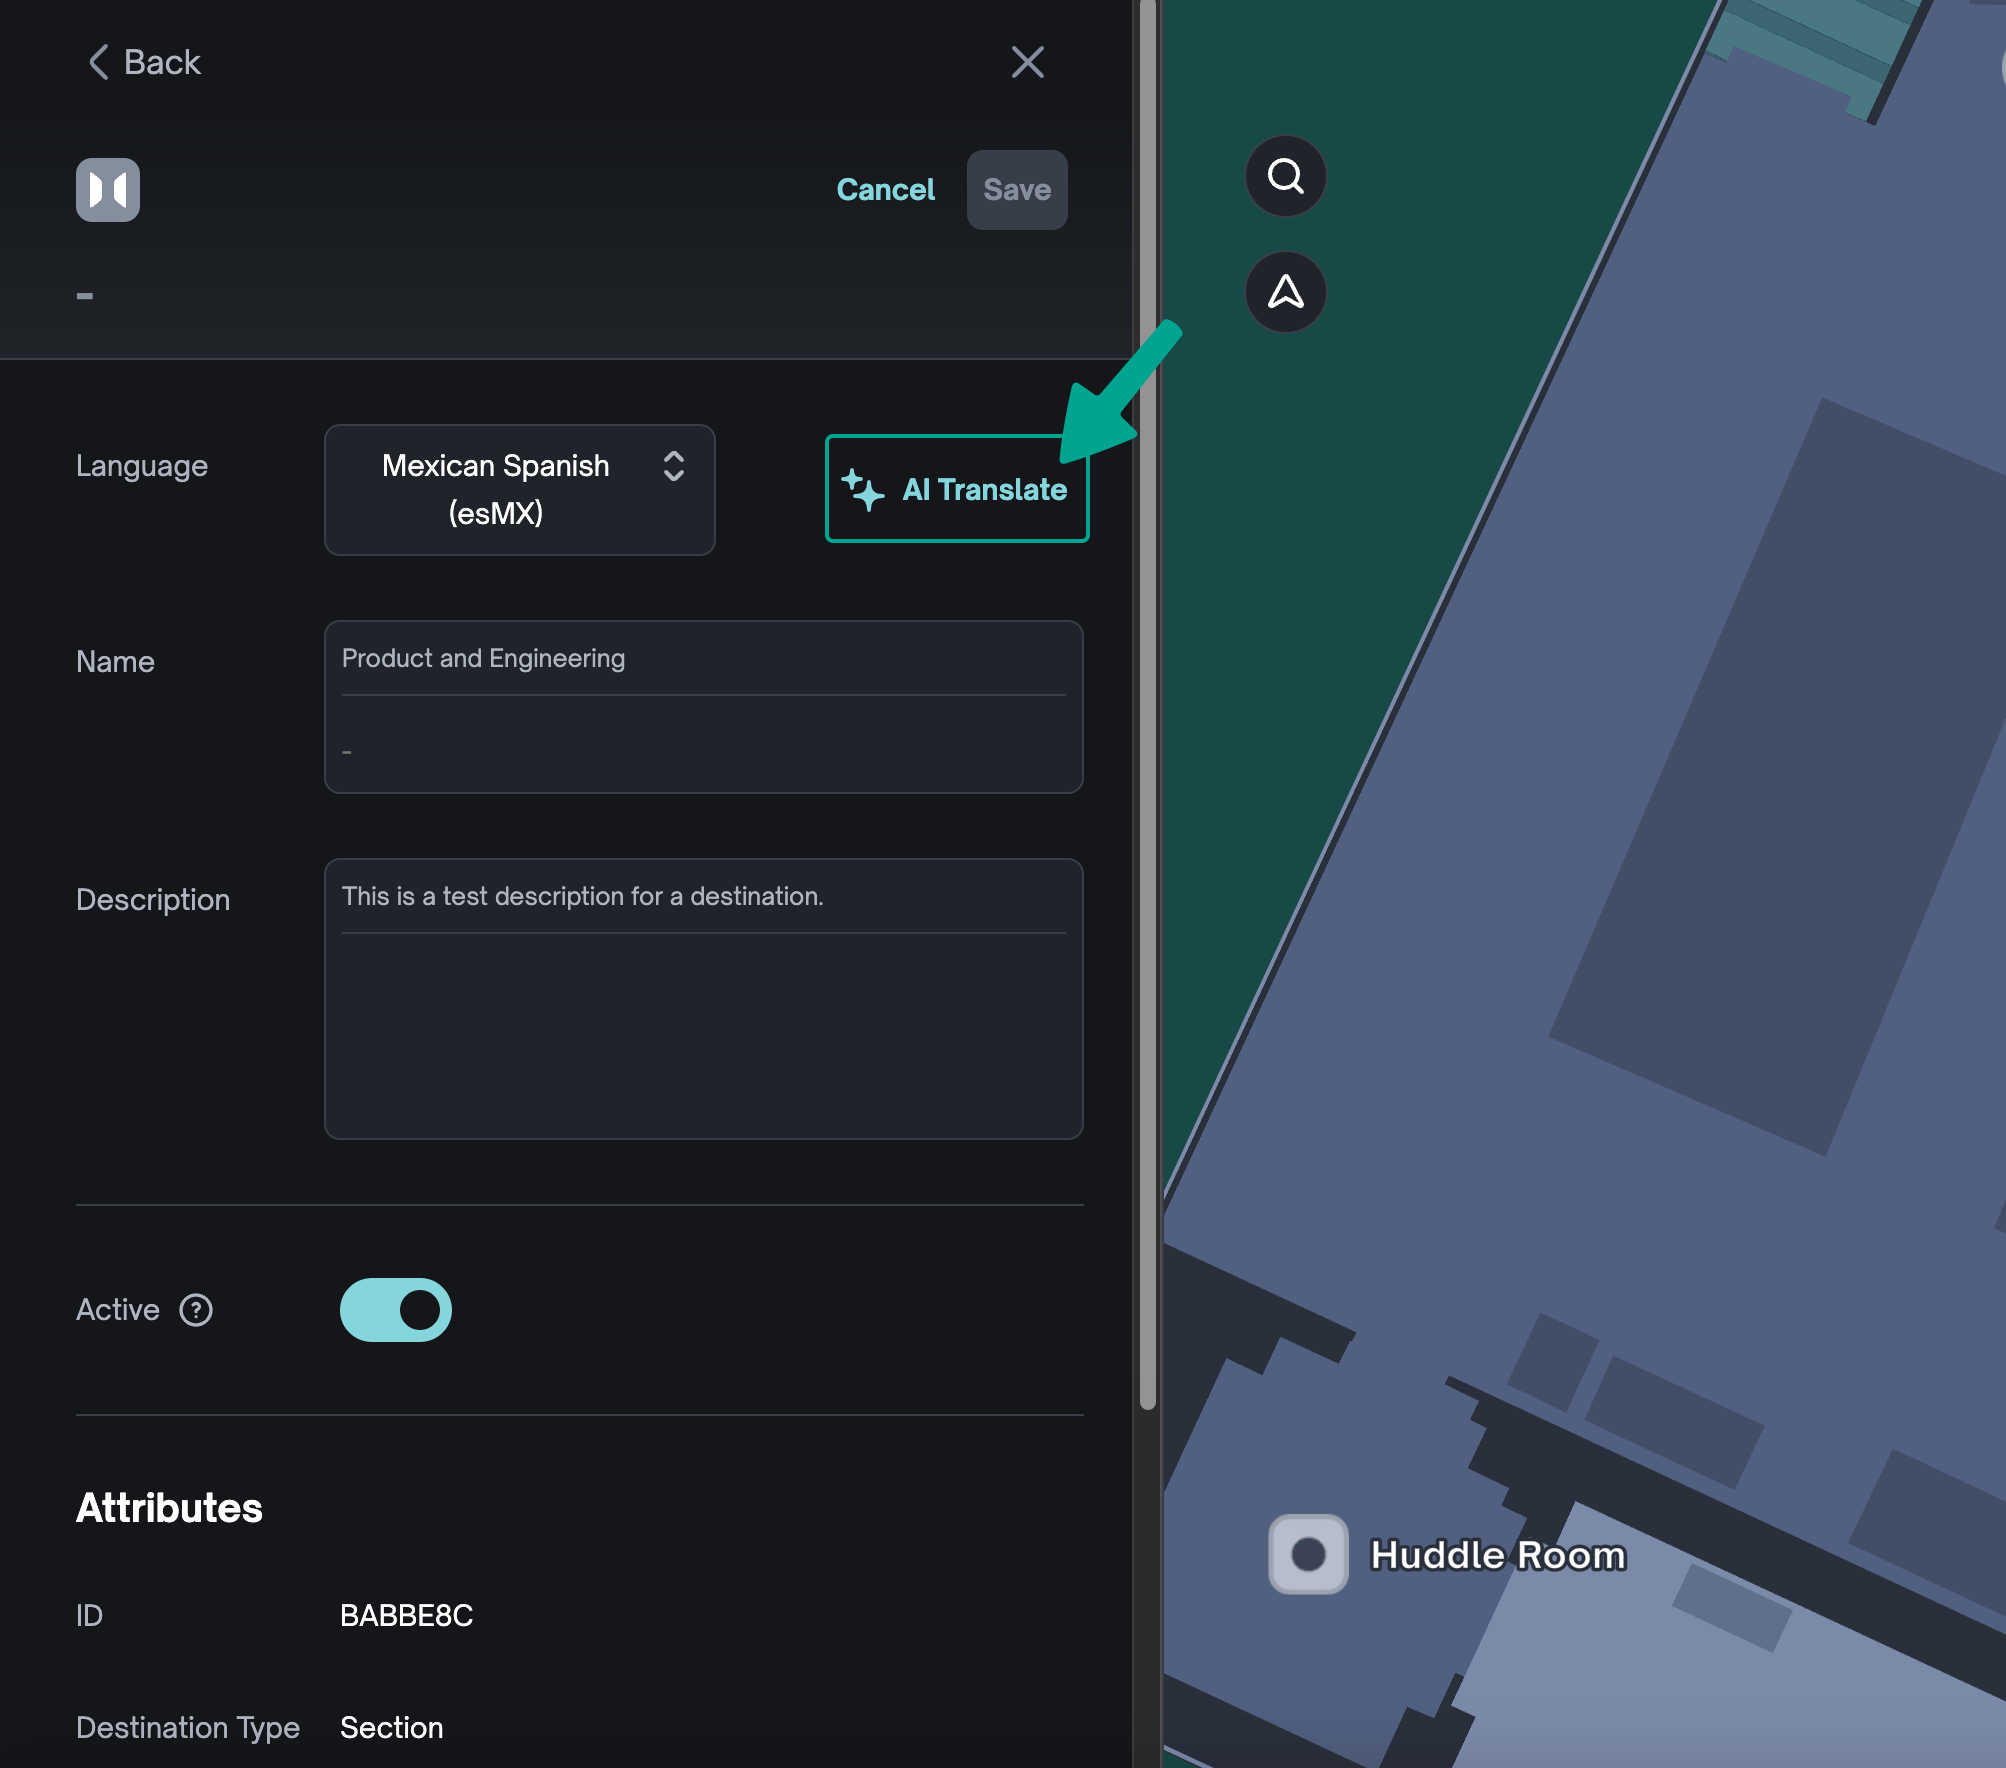
- Click the “Edit” button in the top right corner of the side sheet. Make your desired changes to the name and description.
Using AI Translation in the Side Sheet
Note: Always double-check your AI translation(s) before publishing due to possible errors in translating.
- Translating the destination name: Hover over the destination name field. Click the sparkle icon for the AI translation.
- Translating the destination description: Hover over the destination description field. Click the sparkle icon for the AI translation.
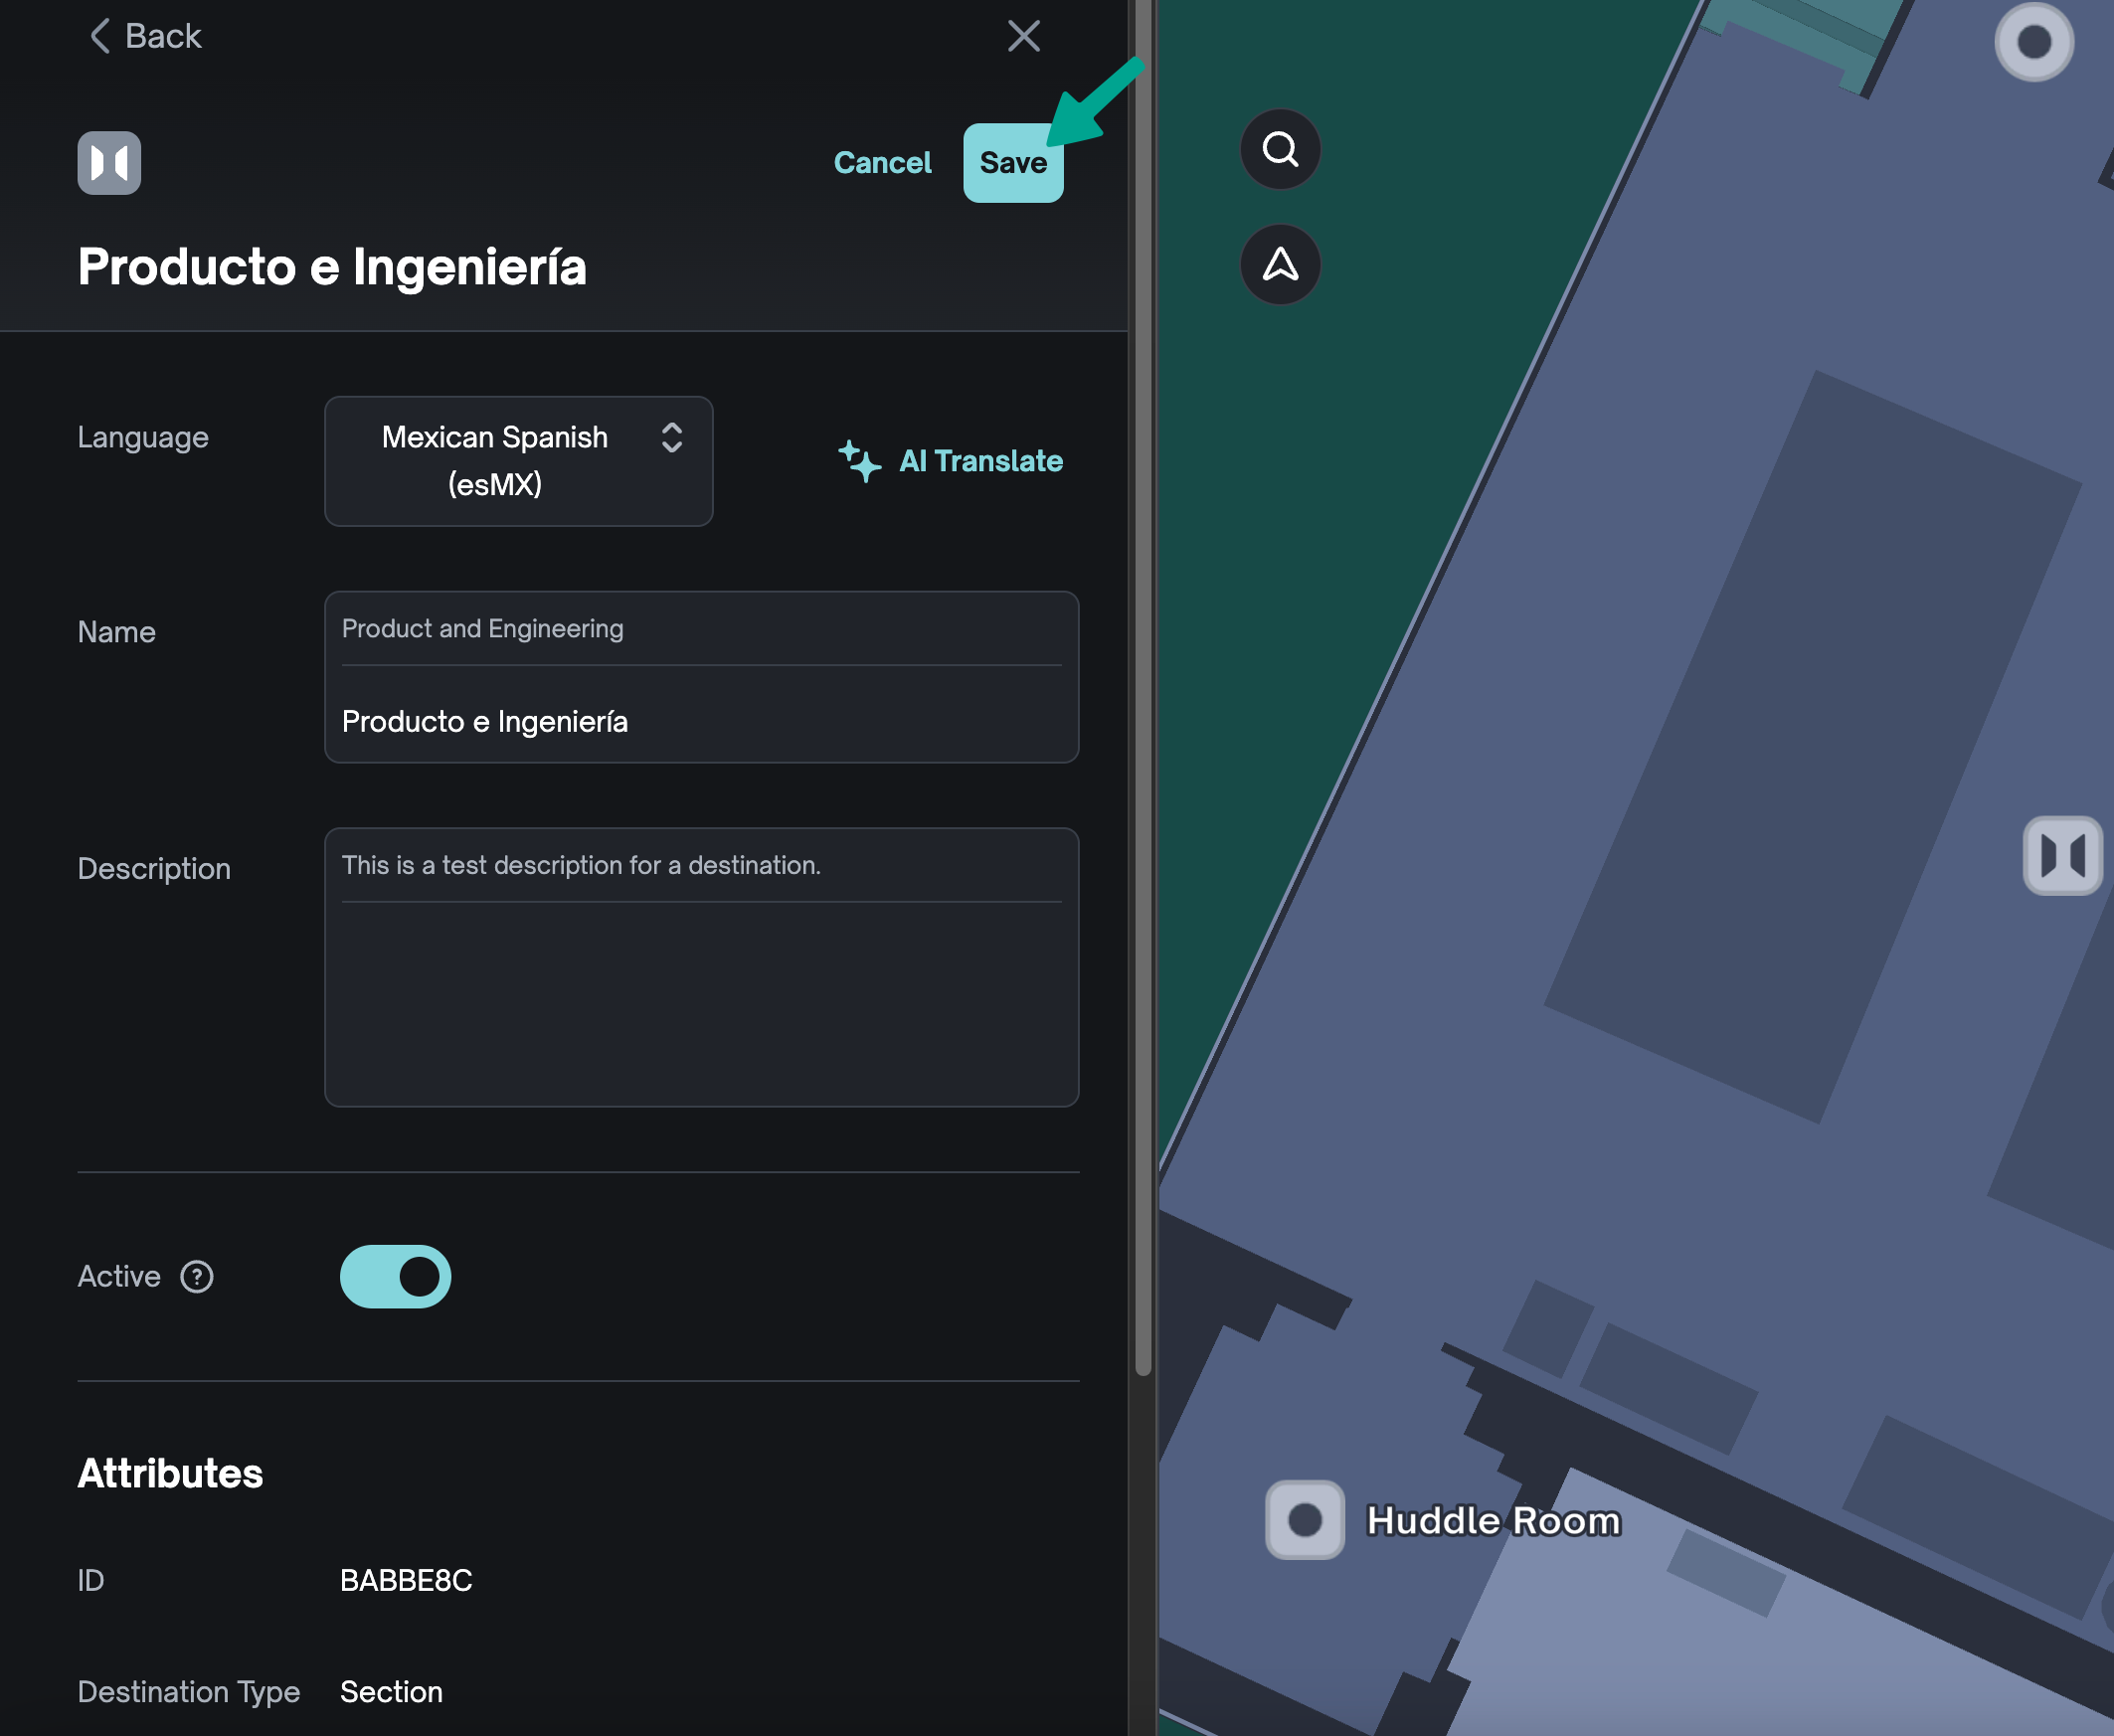
- Translating the destination name and description simultaneously: To the right of the language toggle is the “AI Translate” button. Click on the button to bulk translate the name and description at the same time.
- Click the “Save” button to confirm and publish your changes.
How to Manage a Language in the Translations Editor #
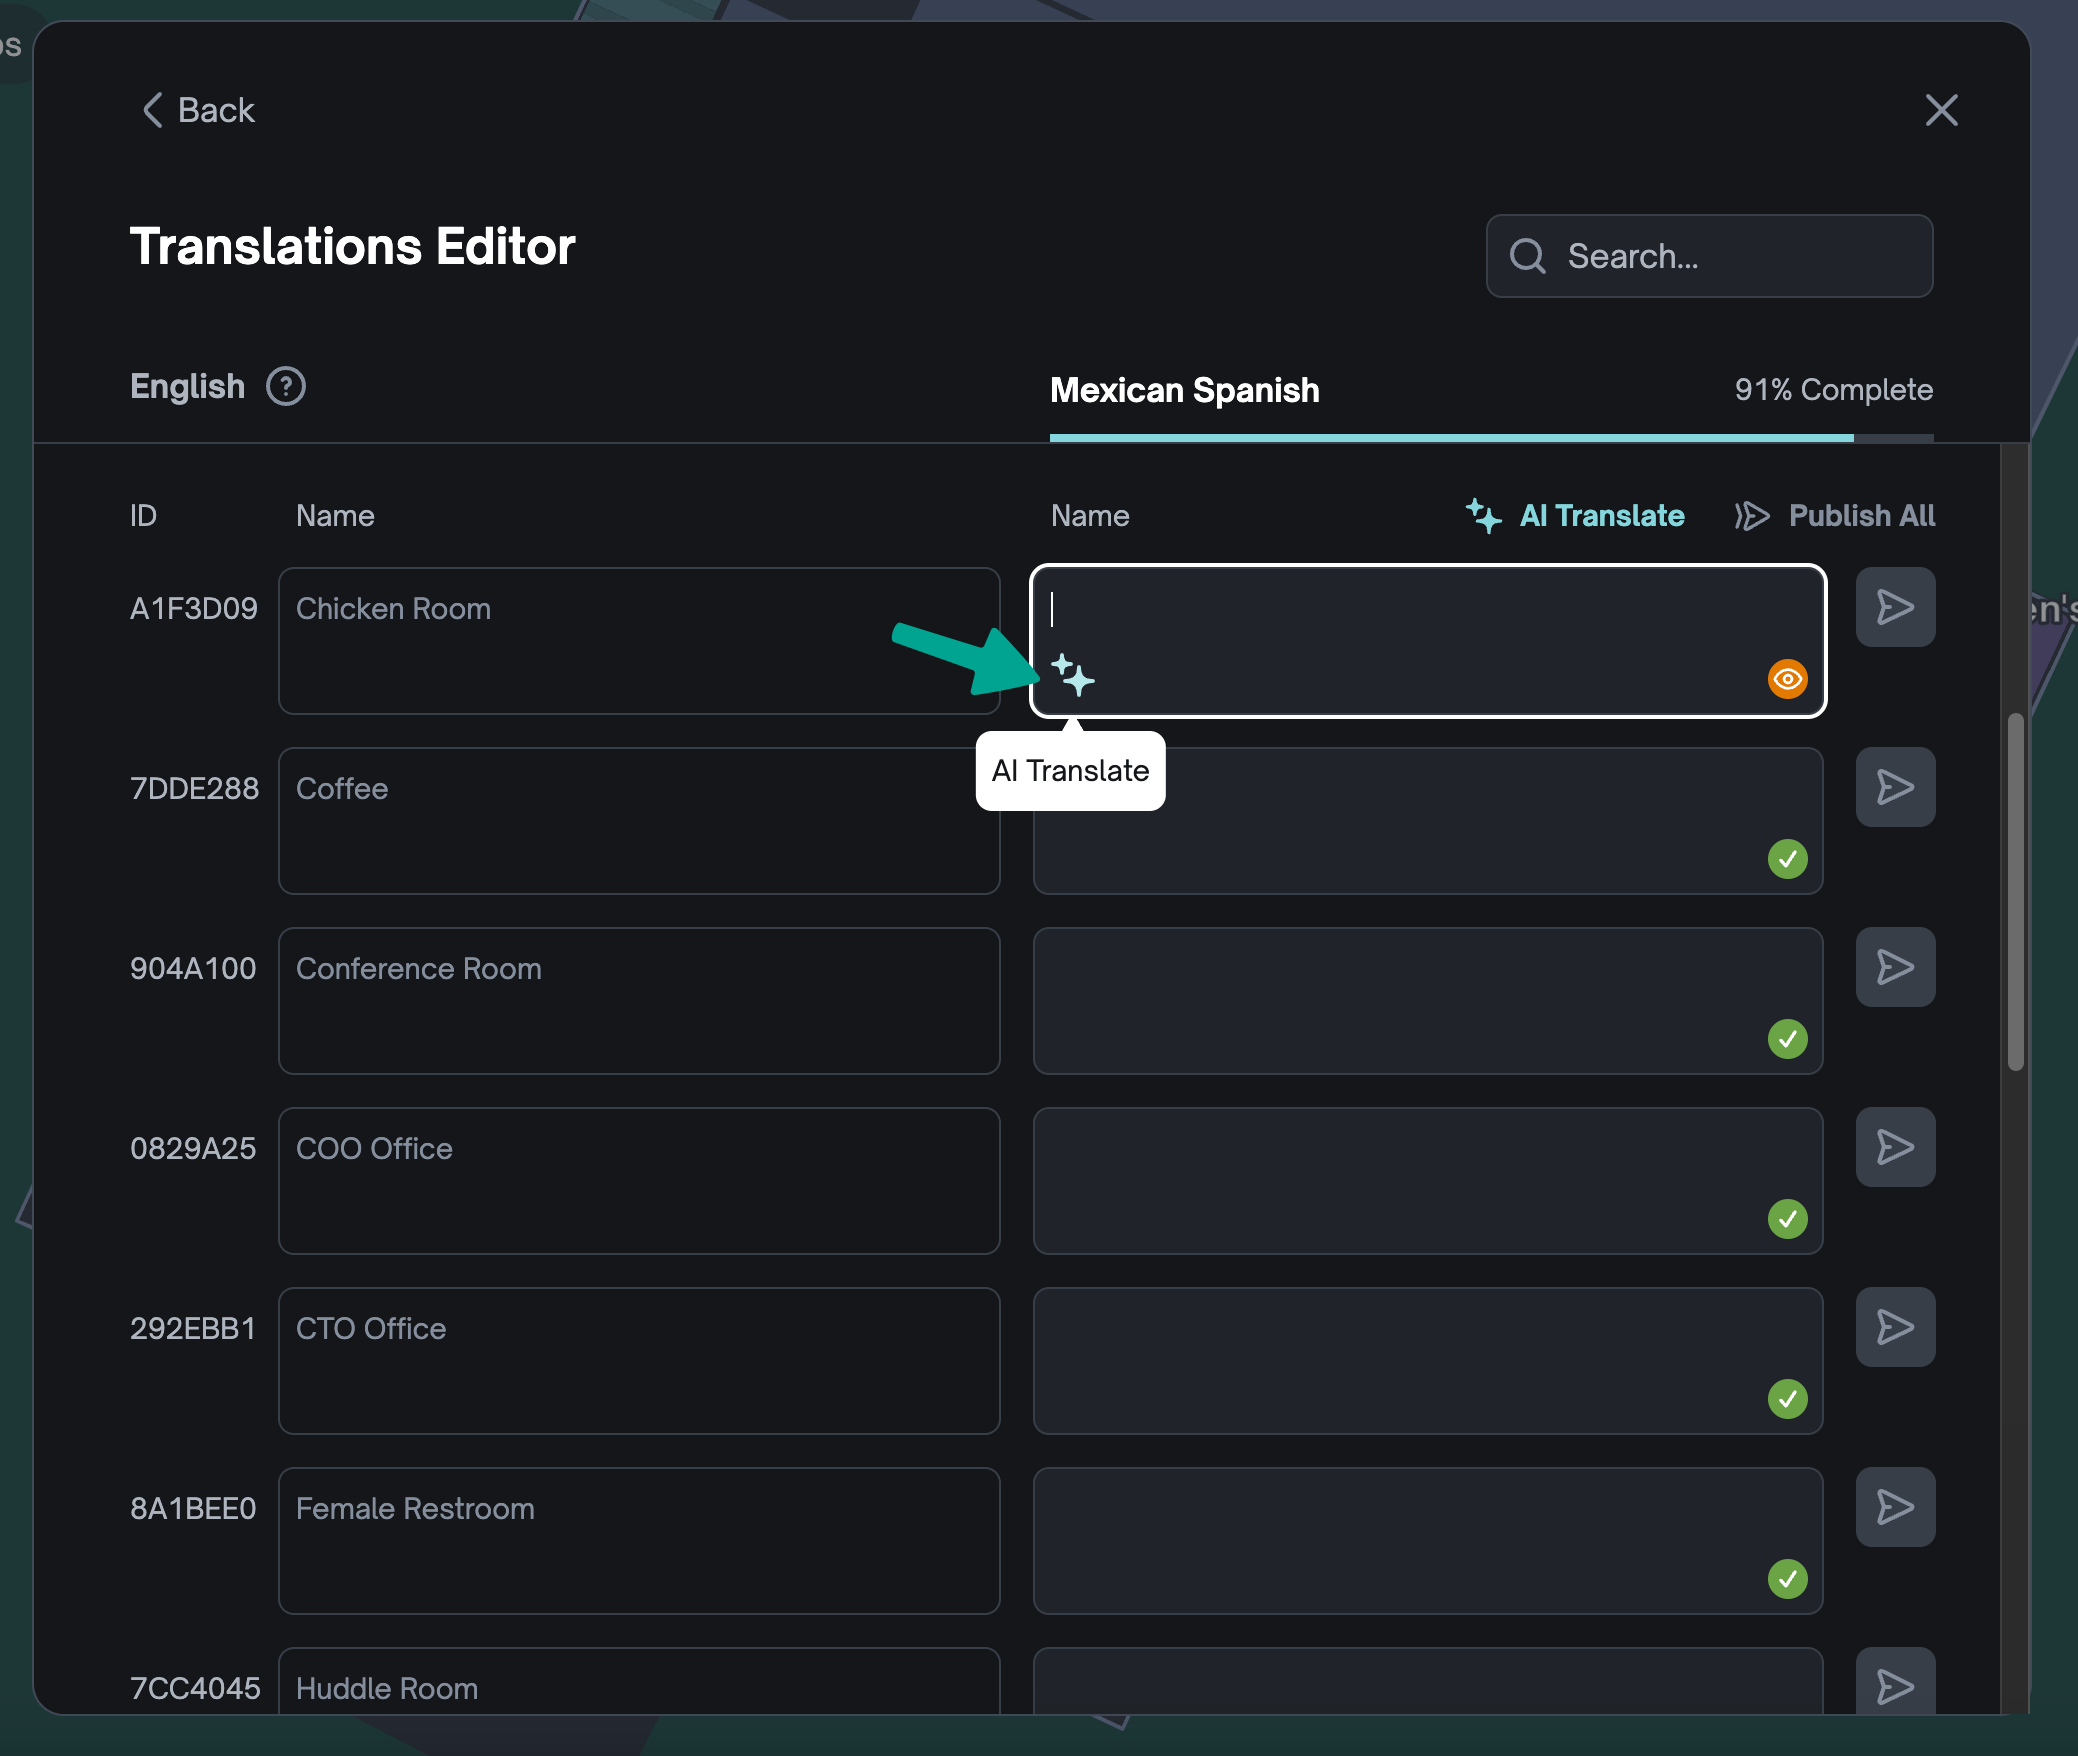
- After clicking on the map name, clicking the 3 dots, and clicking “Manage Languages,” hover over a language you want to make changes to, and click the “Open Editor” button.
- Click into a “Name” field, and located in the bottom left corner is the “AI Translation” button, a feature that will automate your translation for you. Click on the sparkle icon inside the field to auto-translate for a particular destination name.
- A warning will appear at the top of the modal to remind you to double-check your AI translation before publishing due to possible errors in translating. A “Needs Review” icon will also appear as you’re editing the name field. Once you’re done making changes, you can click the light blue icon to the right to publish the translated destination name.
- Once it is successfully published, you should see a green checkmark icon in the bottom right corner.
- If you ever need to unpublish all the translations for a given language, navigate back to the “Language Management” menu and hover over the left side of the language entry. A red icon will appear, and click on it to unpublish.
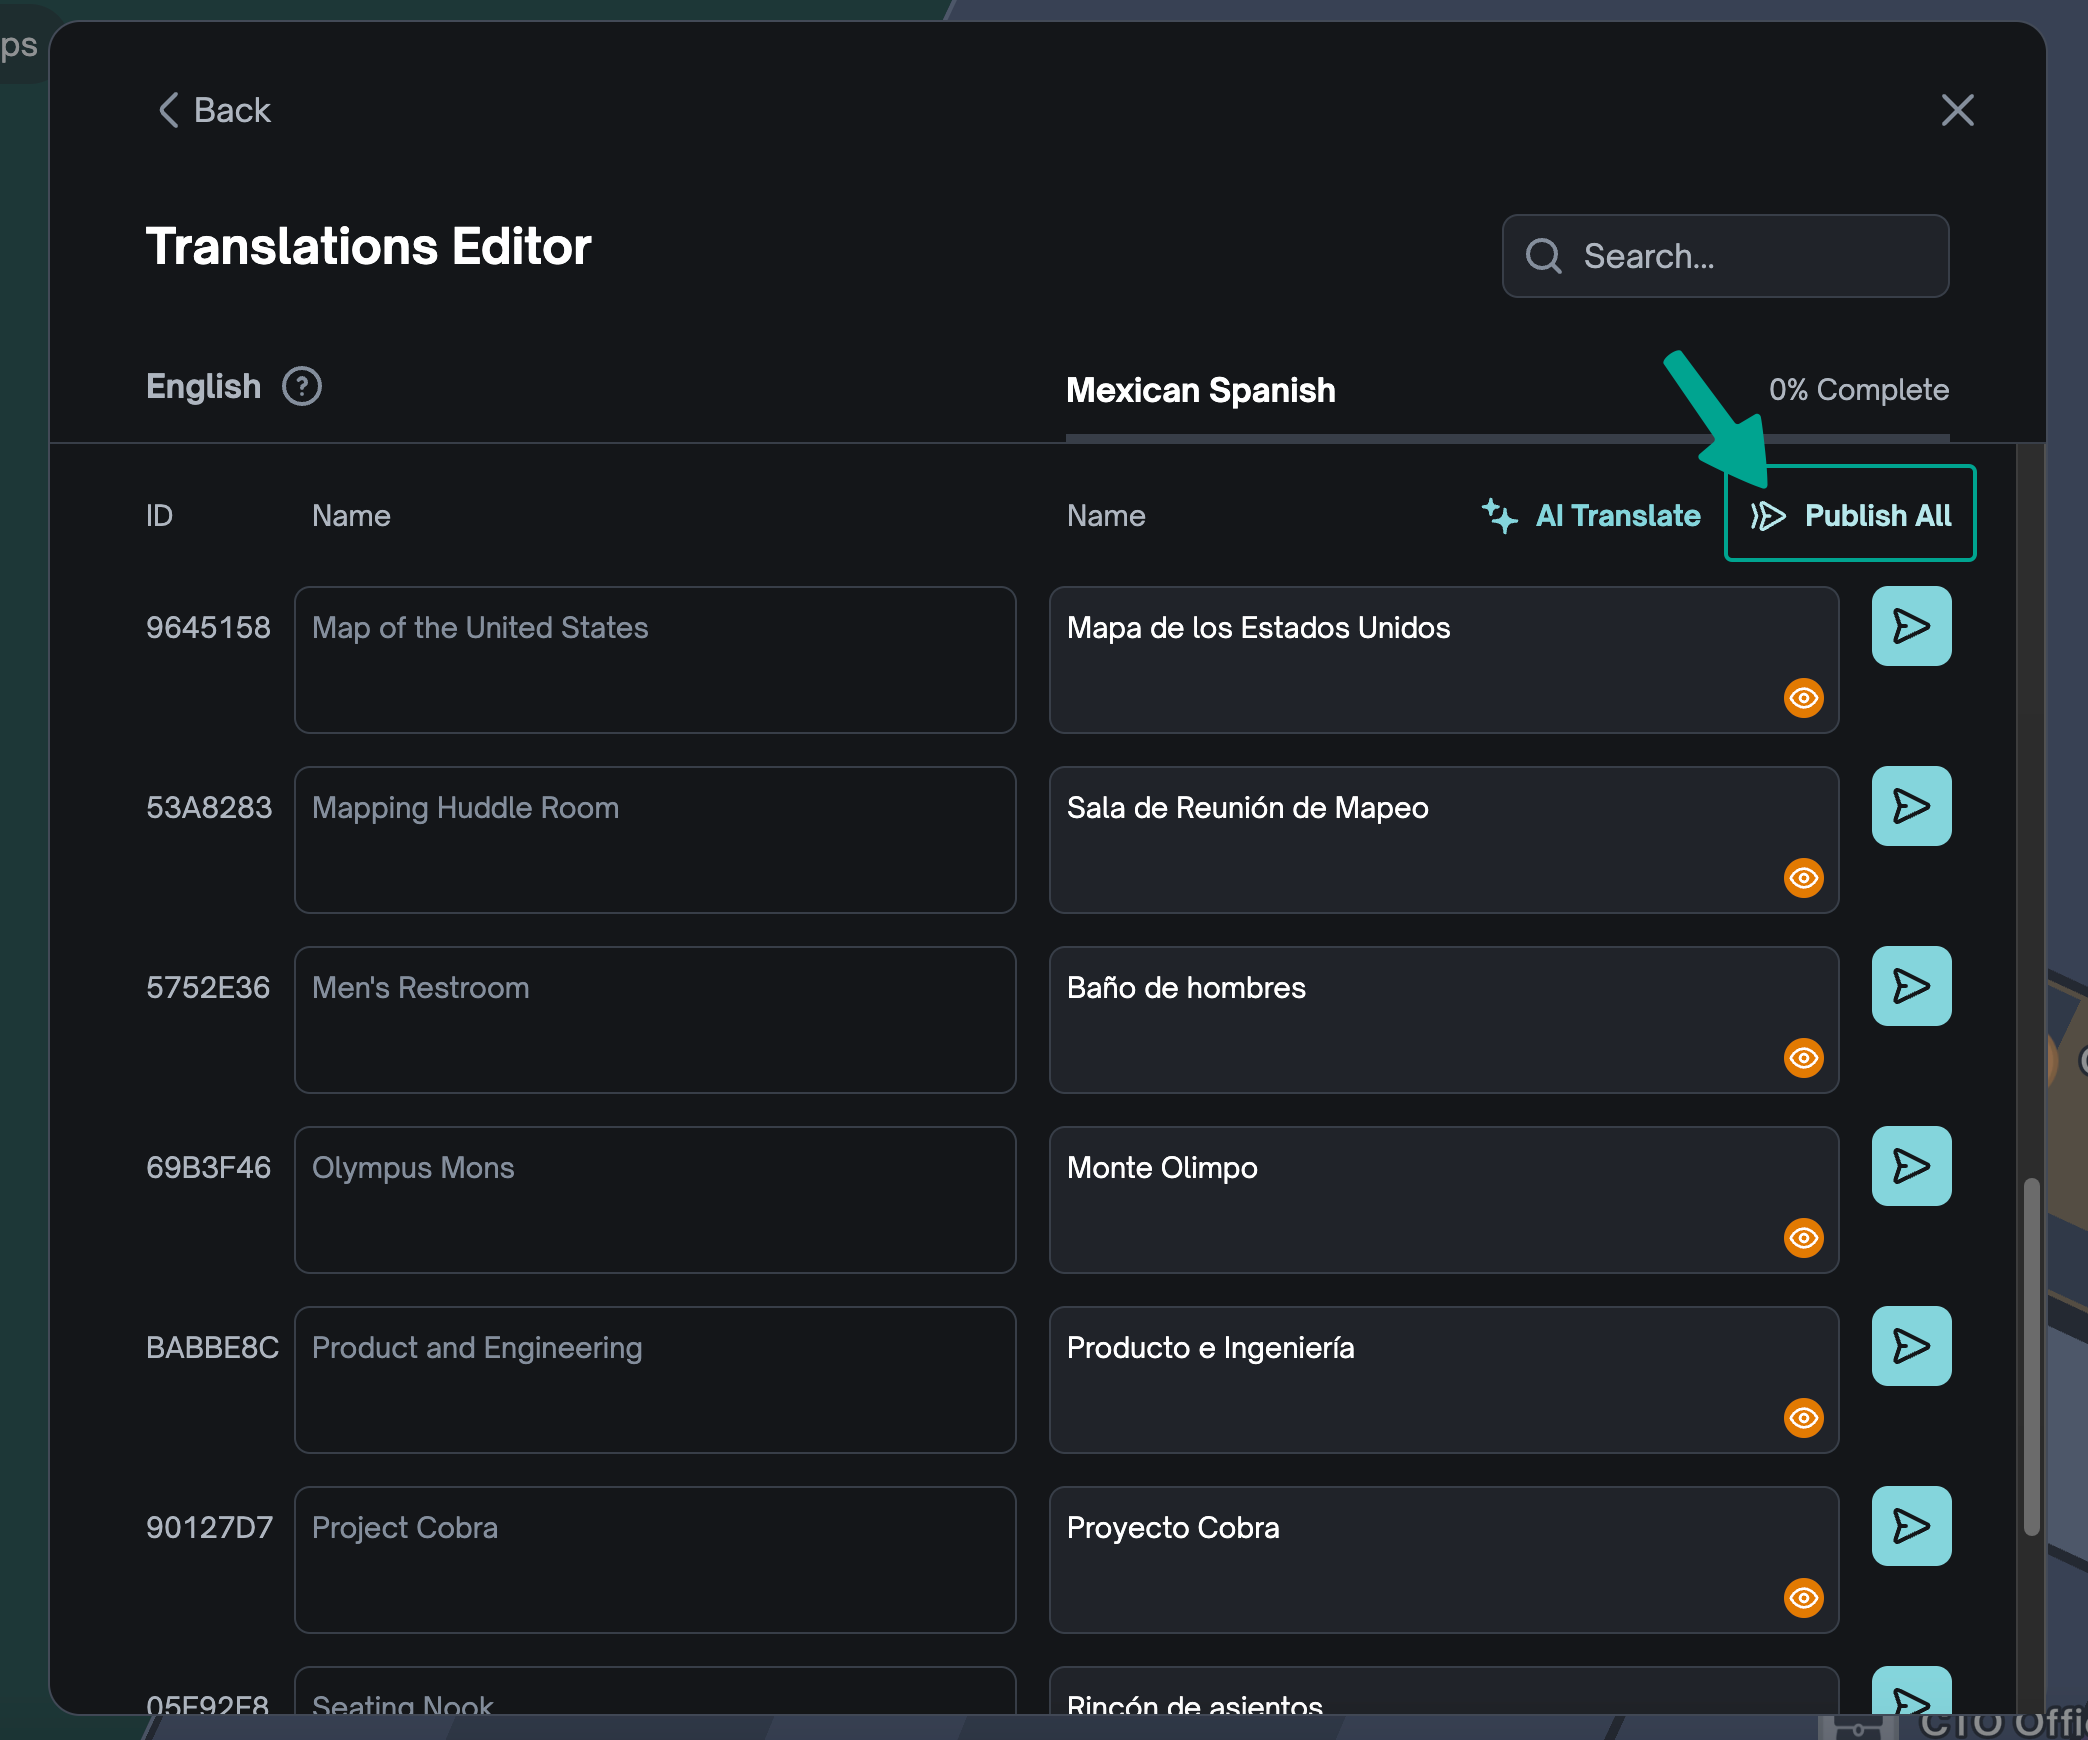
How to Bulk Translate Destination Names Using AI #
- While inside the “Translations Editor,” click on the “AI Translate” button to the right of the “Name” column.
- When you click on “AI Translate” you will be given two options.
- AI Translate Empty Fields Only – this will skip over any translations that already exist!
- Override All Translations – this will translate everything, regardless if it has already been translated before.
- The translations might take some time to load and process, but you will be able to see how many destinations are done translating in real time.
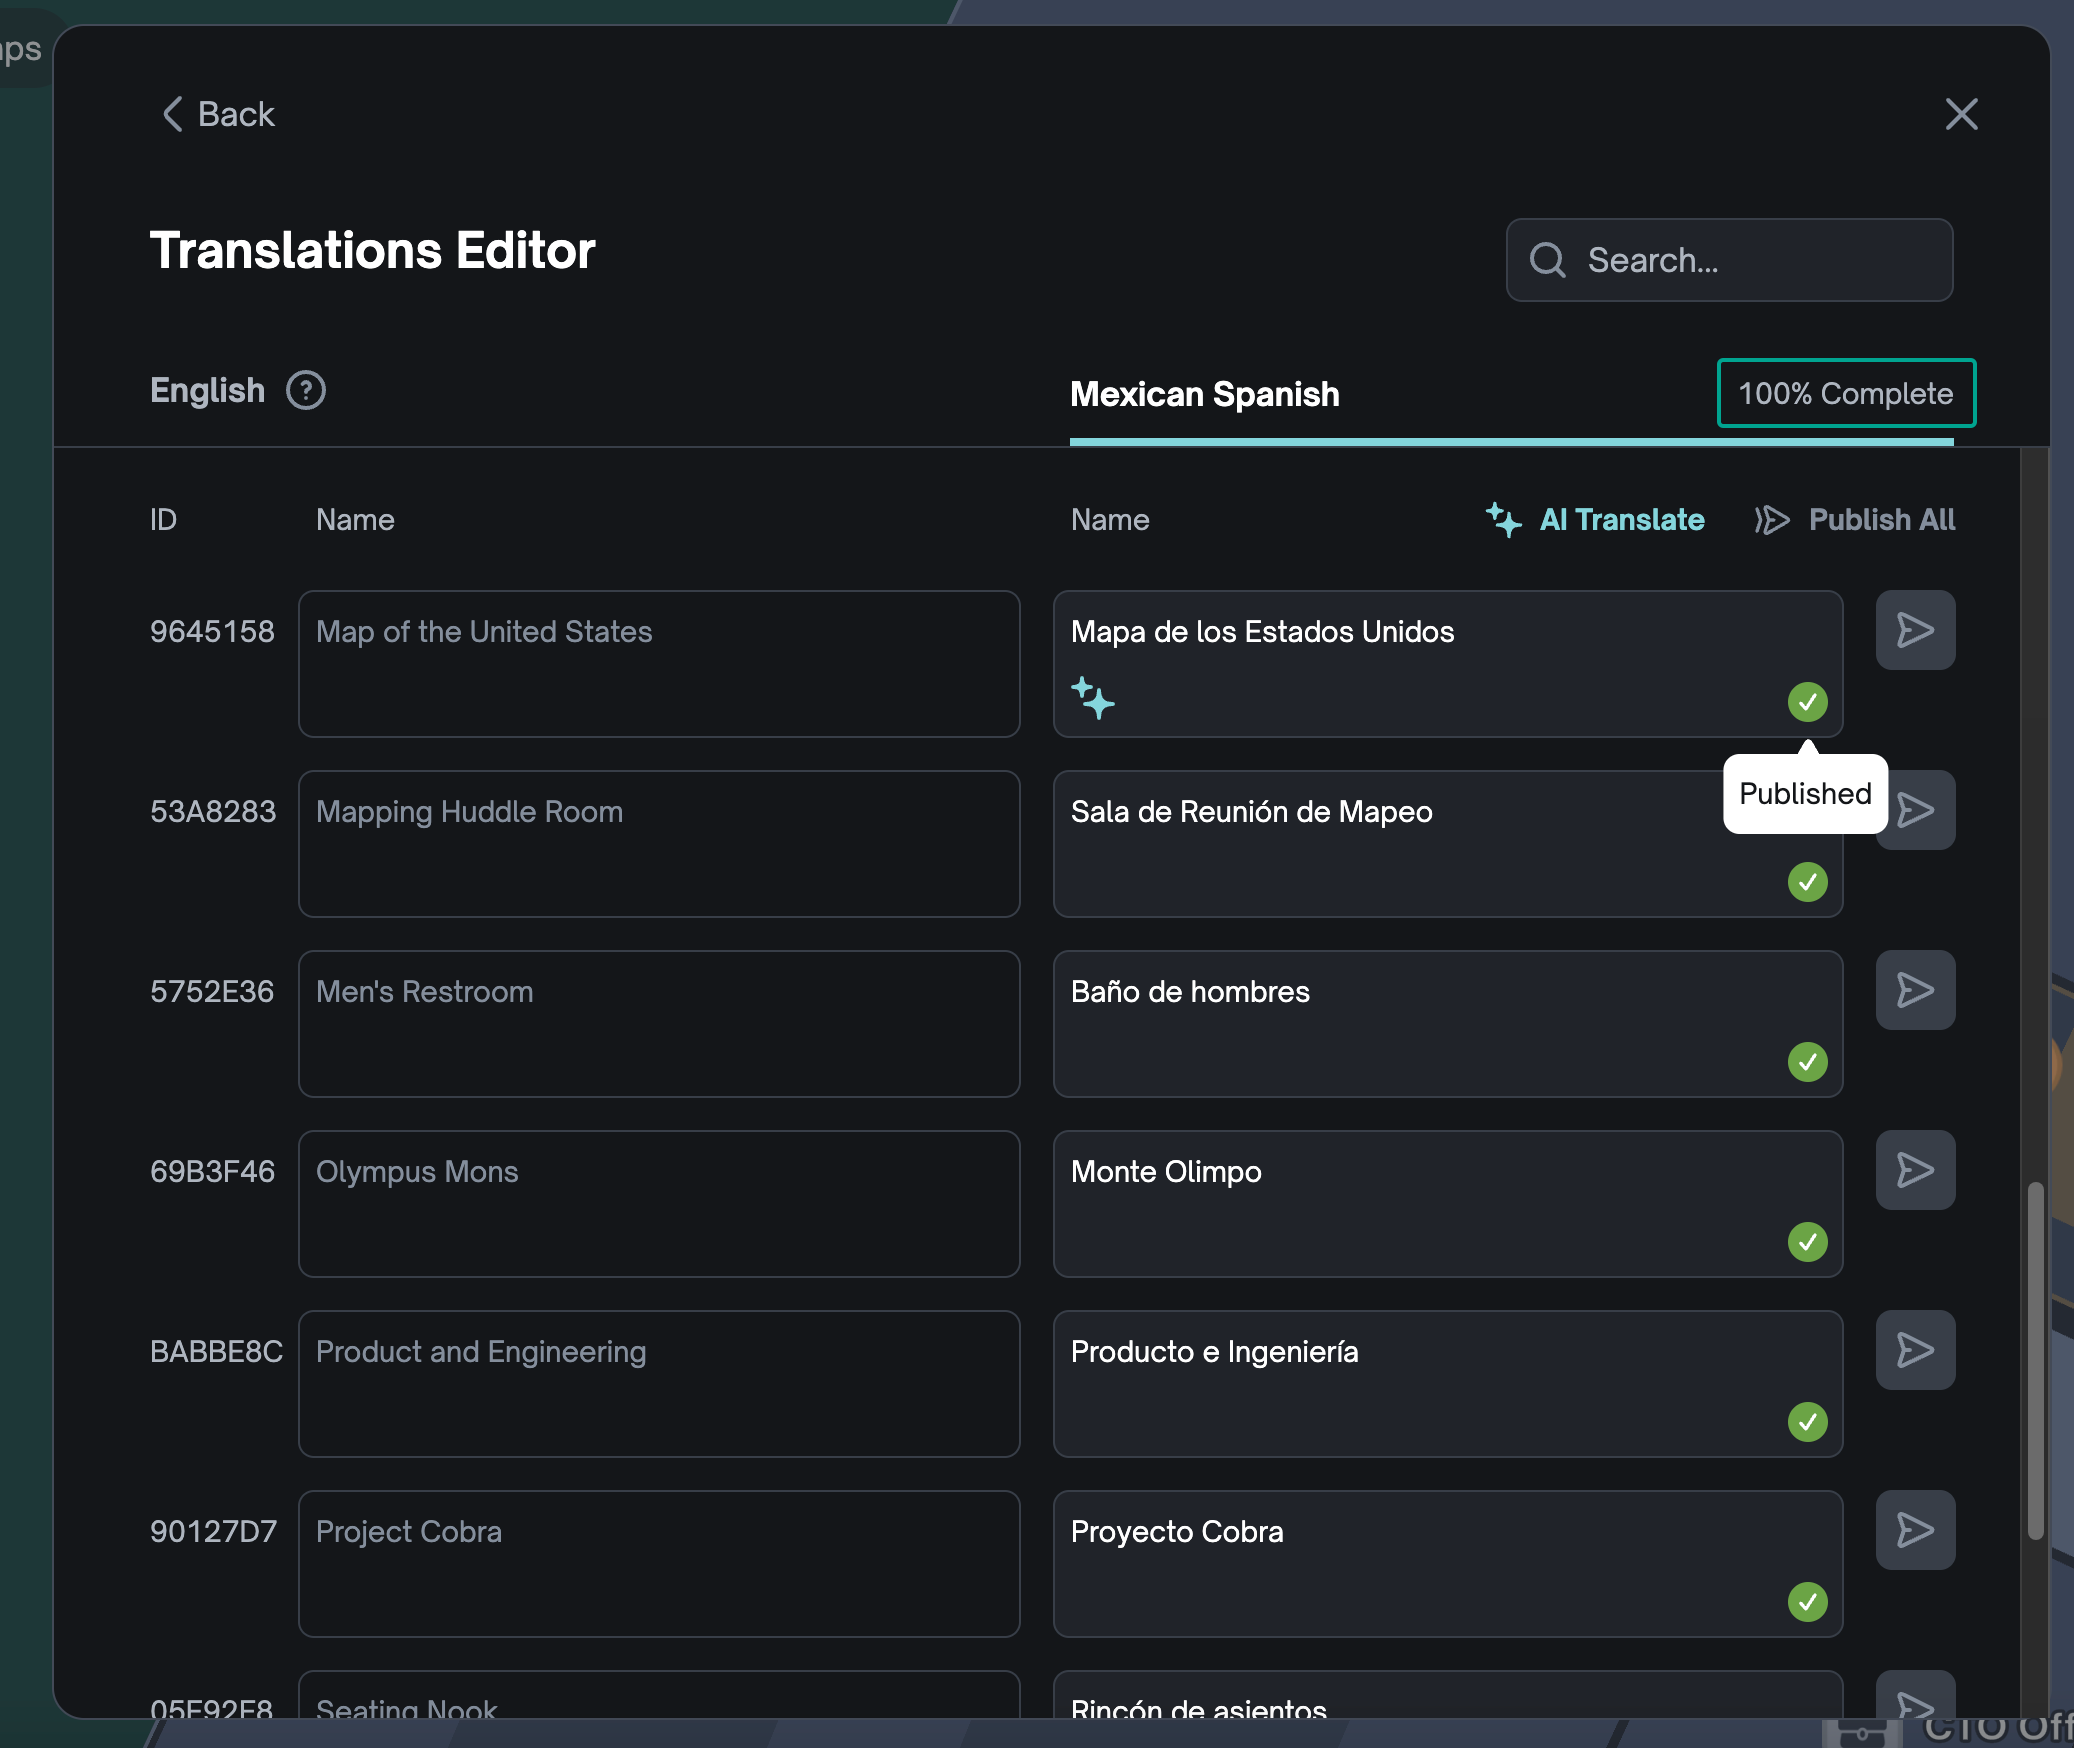
- After reviewing the AI translations, click the “Publish All” button. You will receive a popup asking you to confirm if you are certain that you want to publish all the translations. Click “Publish All” when you’re ready.
- You should see 100% completion of translations in the top right corner right underneath the search bar as well as green checkmark icons underneath each name field to indicate successful publication.
Note: You can also bulk translate descriptions for the destinations!