Route Preview is a feature in Studio that allows a manager of a map to visualize potential routes for users. This is useful for accessibility planning as users can preview a route that may involve stairs or a route that avoids stairs and take alternative methods.
How To Access Route Preview Side Panel #
- Sign into your Studio account.
- Click on the map you wish to preview.
- Click on the circle button on the left side with an arrow inside it.
- A side panel will pop out that says “Route Preview”.

How To Generate a Route Preview #
- Click on the circle button on the left side with an arrow inside it.
- A side panel will pop out that says “Route Preview”.
- In the “Choose starting point…” field you can search for a destination name. This is your starting point.
- In the “Choose destination…” field you can search for a destination name. This is your ending point.
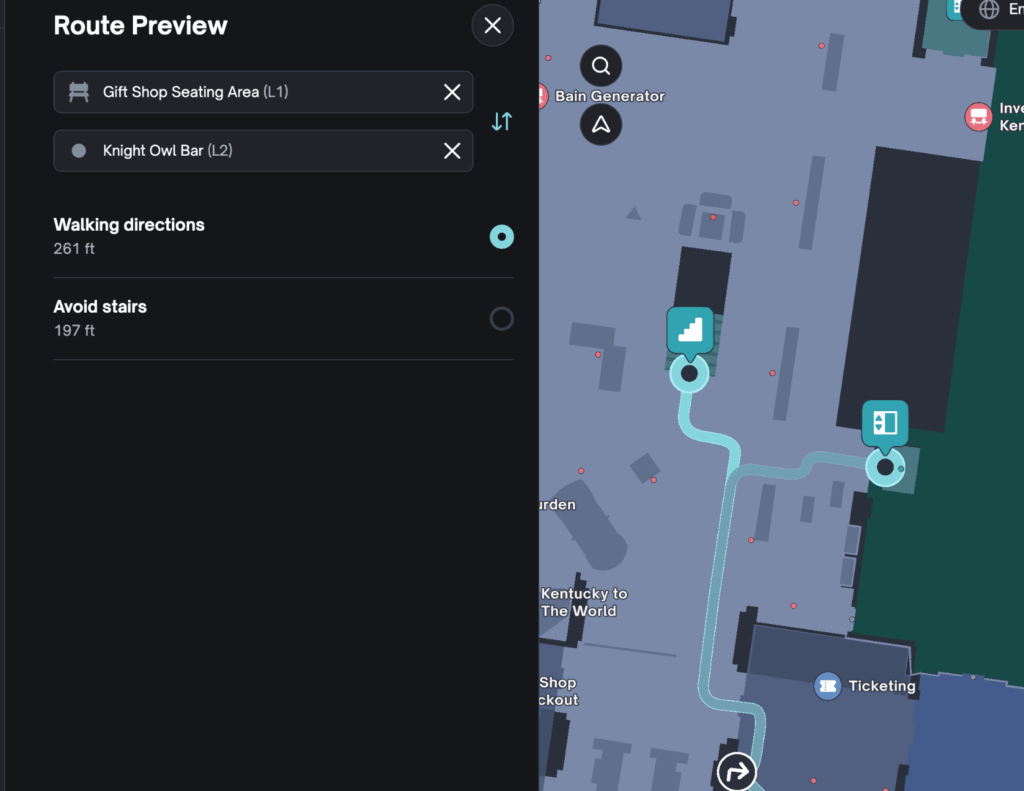
- The route preview will generate on your map with blue lines.
- Underneath the selected destinations, you can choose between seeing:
- Walking Directions – which may involve stairs.
- Avoid stairs – which will find alternative methods to changing levels such as elevators.
- You can switch which route is the primary route you are previewing by clicking these buttons.
- You can use the floor switcher in the right upper corner to continue to see the route if it changes level.
- You can close this route preview by clicking on the × button in the upper right corner of the Route Preview side panel.